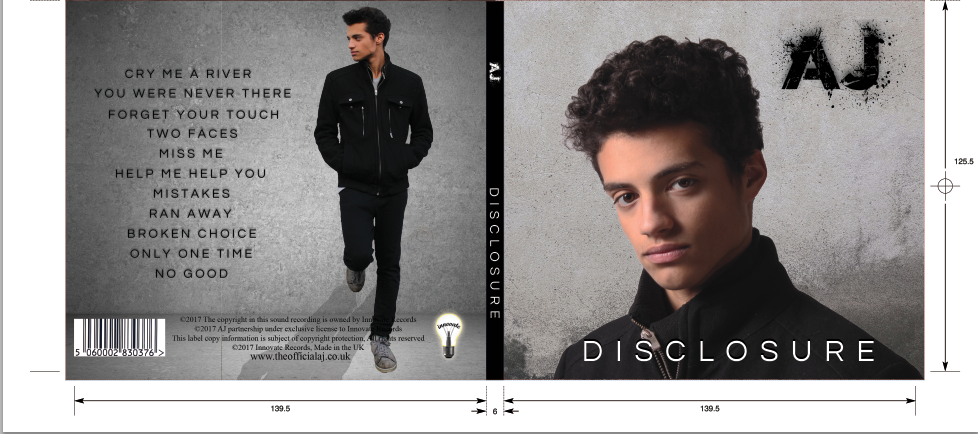
My Outside Digipak Panels
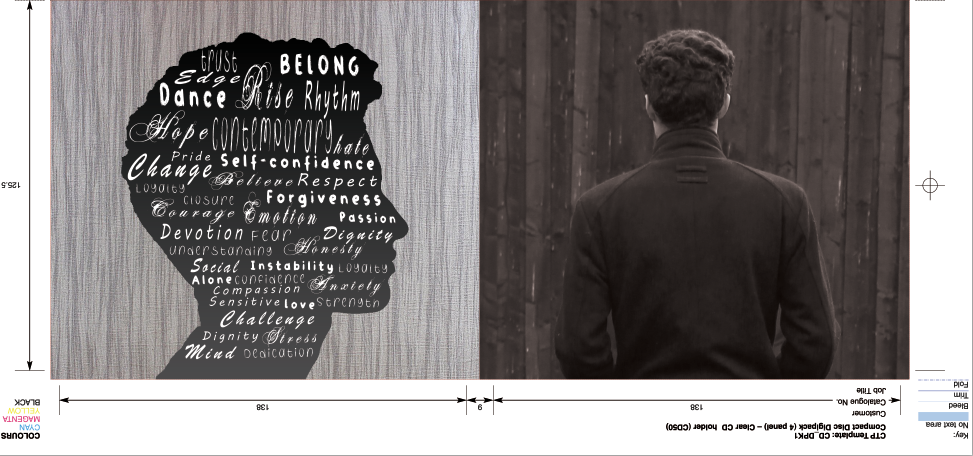
My Inside Digipak Panels
Please click on the image below to view our finished website

Wednesday 1 February 2017
R+P Post 20: Reflections so far/looking ahead
I believe that all of the planning we did up to and including our test shoot and rough cut were really useful as it meant that we had a clear plan knew exactly what was going to happen on the test shoot day. The test shoot and the rough cut helped us to realise that there were a lot of things that needed changing before the final edit. Using the feedback we have received from our teachers, our technician and our friends we have planned some improvements and changes. We can now adapt our shoot board, storyboard and timeline to include all the changes we have discussed and work towards having a successful and efficient main shoot and edit. I am really looking forward to the main shoot as I had a lot of fun during the test shoot.
R+P Post 19: Our Rough Cut
Using our test shoot footage we created a rough cut. We edited as a group and also individually. Below is the final rough cut video itself.
Just like our animatic, the rough cut contained all the titles, sound effects and the soundtracks we wanted to include. We added a second soundtrack for the beginning and middle sections of our opening as we wanted something less dramatic. This piece is called "Ever Evolving" from the album 'Ambient Figures Volume 11'. This was sourced from freeplaymusic.com.
The rough cut was extremely useful as it helped to highlight the issues in our sequence. One of the main issues with our rough cut was that it was over the 2 minute time requirement. We tried to shorten the length of our opening by using Adobe Premiere Pro to speed up some shots or on the rare occasion cut small sections out so that they would take up less time (for example we cut the perfume shot from three sprays to two). However this was mainly due to the fact that our raw footage was longer than we had planned. For the main shoot we are going to follow the timings on our timeline strictly to avoid having to speed up/cut small bits out of our footage.
Another issue that both our group and our technician noticed was the sound levels. For example the ambient sound during the scenes with the radio announcement distracts from the announcement itself. To improve this we plan to cut the ambient sound entirely whilst the radio is on so that the audience can focus completely on what is being said. Additionally we need to change the sound levels slightly for our main edit so that the transitions are smoother.
R+P Post 18: Our Test Shoot
We carried out a test shoot in the same way we would carry out our real shoot in order to see if our sequence works practically and to highlight any changes or improvements we would need to make. Our call time was 9:00am and we wrapped at 4:00pm.
Using our test shootboard, we had planned each shot and the order in which they would be filmed so that it would be completed on time. We changed the order of a few of the shots on the day in order to be as efficient as possible. Instead of starting with the outdoor shots, we started with the morning routine section so that our actress wouldn't have to continuously apply and remove make up. We found this to be more practical and a change we will apply to our main shoot. Here is a sample page of our shoot board.

I was very pleased with our test shoot as I found there were many shots I was happy with for example our lipstick shot and the stalker's point of view shots.
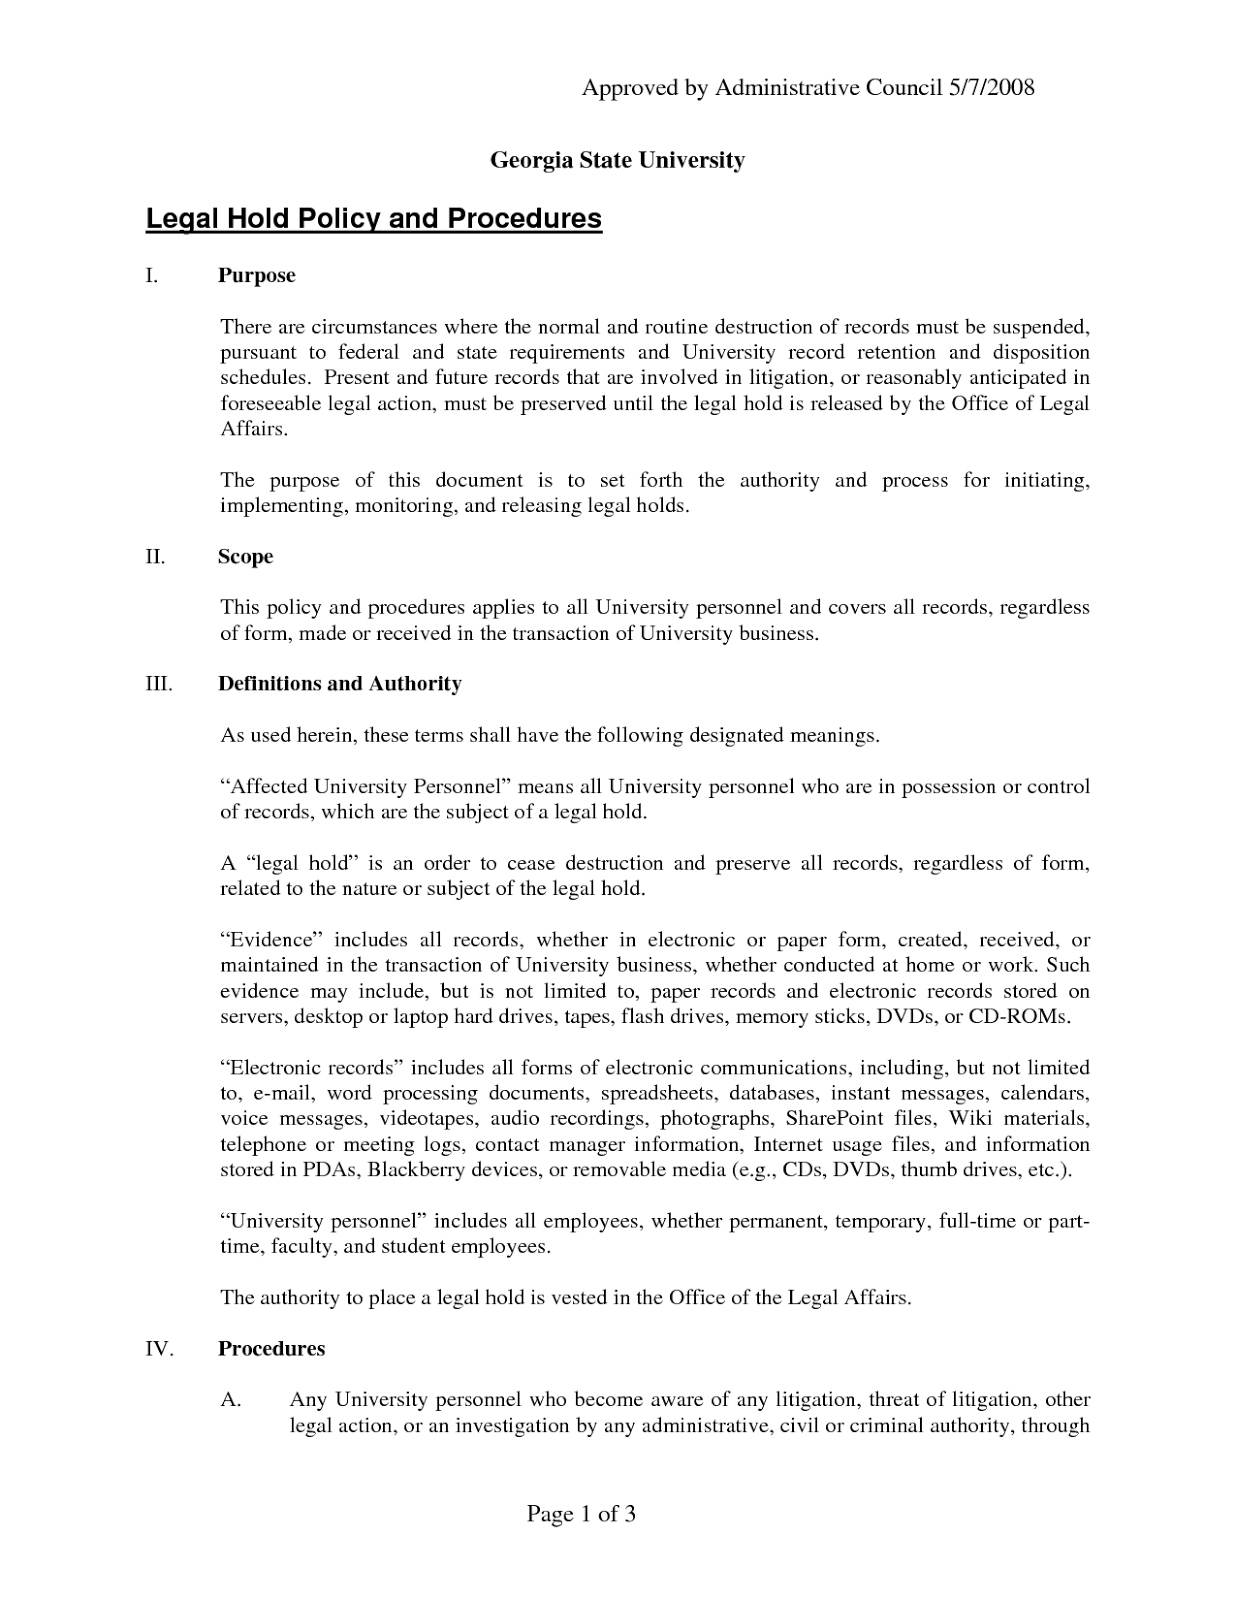
There were also shots that I think we could improve on for our main shoot. Firstly was our shot of the legal document. This was included so that the audience realise that our character is a high profile lawyer and involved in the court case mentioned on the radio. However the document had no relevance at all to the radio announcement and it was also difficult to read. For our main shoot, if we decide that this document is to be a crucial part of the narrative, we need to make it more relevant, easier to read and linger on it for longer in order to allow the audience enough time to read it.
Secondly was the shot of the character putting on her shoes. This was very time consuming and lead to the shot lasting longer than it was supposed to. We are going to change this by having her put her shoes on beforehand or by having a longer stalker's point of view shot when she leaves the kitchen, giving enough time for her to have put her shoes on off screen.
Finally we noticed a continuity error between our last two shots. Our actress moves a few metres between the shots and it is noticeable as the location is quite different. We plan to improve this by changing the location of the previous shot and moving it slightly further down the street so that the locations are the same in both shots. This is due to the fact that the suspense and climax in the previous section didn't appear how we wanted. Instead of creating tension it created confusion and this is something we plan to change for our main shoot as well.
I found that our test shoot was extremely useful as it allowed us to see what we needed to improve and what worked well. Additionally it meant that we could find out what made sense to our audience as well as what confused them. To begin with the costumes we had planned were not ready in time for our test shoot and so we had to change our plans. However we realised that our lawyer's outfit wasn't appropriate for a high-profile work environment and so for our main shoot we are going to make sure that we have the more professional, formal dress. In addition to this the jogger's costume didn't connote the character well enough. By the main shoot we are hoping to use the costumes that we planned in order to represent each character better.
We spoke to our teachers, technician and friends for their opinions on our test shoot and we can now use this feedback to improve our main shoot of the opening sequence. Below is the feedback we received typed up on a word document.

 The feedback and test shoot itself were helpful as it has lead to us making a lot of changes, helping us to develop and improve our project.
 |
| Shooting the jogger sequence |

I was very pleased with our test shoot as I found there were many shots I was happy with for example our lipstick shot and the stalker's point of view shots.
There were also shots that I think we could improve on for our main shoot. Firstly was our shot of the legal document. This was included so that the audience realise that our character is a high profile lawyer and involved in the court case mentioned on the radio. However the document had no relevance at all to the radio announcement and it was also difficult to read. For our main shoot, if we decide that this document is to be a crucial part of the narrative, we need to make it more relevant, easier to read and linger on it for longer in order to allow the audience enough time to read it.
Secondly was the shot of the character putting on her shoes. This was very time consuming and lead to the shot lasting longer than it was supposed to. We are going to change this by having her put her shoes on beforehand or by having a longer stalker's point of view shot when she leaves the kitchen, giving enough time for her to have put her shoes on off screen.
Finally we noticed a continuity error between our last two shots. Our actress moves a few metres between the shots and it is noticeable as the location is quite different. We plan to improve this by changing the location of the previous shot and moving it slightly further down the street so that the locations are the same in both shots. This is due to the fact that the suspense and climax in the previous section didn't appear how we wanted. Instead of creating tension it created confusion and this is something we plan to change for our main shoot as well.
I found that our test shoot was extremely useful as it allowed us to see what we needed to improve and what worked well. Additionally it meant that we could find out what made sense to our audience as well as what confused them. To begin with the costumes we had planned were not ready in time for our test shoot and so we had to change our plans. However we realised that our lawyer's outfit wasn't appropriate for a high-profile work environment and so for our main shoot we are going to make sure that we have the more professional, formal dress. In addition to this the jogger's costume didn't connote the character well enough. By the main shoot we are hoping to use the costumes that we planned in order to represent each character better.
We spoke to our teachers, technician and friends for their opinions on our test shoot and we can now use this feedback to improve our main shoot of the opening sequence. Below is the feedback we received typed up on a word document.


R+P Post 17: Our editing arrangements
Our editing arrangements were based on our free periods. This made editing a lot more convenient and it also meant we could all spend a roughly equal time editing. If we needed to we used lunch times as well and as a back up we stayed after school. For our rough cut, no lunch time or after school sessions were needed and we met our deadline. We are most likely going to use the same arrangement as our rough cut edit schedule for our main shoot as it worked well and we were all happy with it. Below is a copy of our rough cut edit schedule.


R+P Post 16: Casting, costume, hair and make-up
Our two main characters that will be seen in our opening sequence are the lawyer (Shania Morcott) and the jogger. We have planned out both costumes for our main shoot.
The lawyer's main costume is going to be a black dress, blazer, tights and a belt. When we are filming outdoor shots she also will wear a coat and a pair of black heels. Additionally in the morning routine sequence, she will start by wearing a silk nightdress with a matching gown. Her hair will be kept open but neat and her make up is to be very professional. This will be done by using neutral colours for the eye make-up and keeping the face make-up as simple as possible.
The jogger's costume will consist of a blue t-shirt, white shorts, a pair of white socks and trainers along with a sports watch. No make-up is required for the jogger and the hair will be left the same as the actor normally has it.
Below is a table which summarises the costume, hair and make-up for each character along with some photos of what they will look like on the day.

R+P Post 15: Our filming location, set design and props
For our test shoot, we are planning to use a range of different rooms in Sian's house as well as Epping Forest which is down the road from her house. The rooms we are going to use are the bedroom, kitchen, hallway and garden. Below are top down plans of the kitchen and bedroom, showing where everything is positioned in the rooms.
We have chosen Sian's house as she has a large kitchen with french doors meaning it will be easy to do the stalker shots. Additionally her house is very close to Epping Forest which is where we plan to film our jogger/red herring sequence. Her street is also fairly quiet which means that the noise of cars will not be too much of an issue.


 |
| Bedroom Top Down Plan |
 |
| Kitchen Top Down Plan |
We will have to dress each set so that it will look exactly like our character would have had it. As our main character is a slight perfectionist and very organised, each room will have a simple but sophisticated vibe.
We also have quite a few props to include. The main ones being the alarm clock, documents, folders and radio. Here is a copy of the document we plan to use in the test shoot.
 Below is a document which summaries the rooms in location 1, the props that we require and how we are going to dress each set.

R+P Post 14: Our filming arrangements
For our test shoot, we made a clear plan so that we all knew what we were doing to avoid confusion. The plan also helped things to run smoothly on the day. This was completed on a shoot organisation form. The form contained information such as the date, call and wrap times, locations, actors, props and equipment release times. It was signed by all members of our group, our teacher and our media technician. Below is a copy of the form.
 |
| Shoot Organisation Form |
The arrangements we made we as follows:
- Crew call time: 9:00am
- Crew wrap time: 4:00pm
- Locations: Sian's house and Epping Forest
- One actress (Tyra) who was messaged the details of shoot arrangements
We also made a shootboard which contains the order of each shot as well as the framing and camera movement, actors/actresses, props and crew roles. The shootboard was useful as it made sure everything ran on time and it was a way of recording every shot and the number of takes required. It also had space for us to write the best take after watching the rushes which helped to make editing easier and efficient.
R+P Post 13: Our Animatic
On completing our storyboard, we used it to create an animatic. An animatic is an animated storyboard. To make it we recreated all the shots from our storyboard within the school and photographed them. We then edited during the week, following an editing schedule so that we could all contributed and that we completed the task on time. Below is a scan of our editing schedule.
We then put these photos onto Adobe Premiere Pro and arranged them in the same order as our timeline and storyboard. Once they were in order, we gave them the same timings that we had planned on the timeline. Along with our photos, we added images of our distribution company's ident and our production company's ident, all our sound effects and our chosen soundtrack. Below is our finished animatic.
 |
| Animatic Edit Schedule |
From completing the animatic, we learnt a lot about our opening sequence. We found that it is quite difficult to film through windows for our stalker POV shots as it is hard to see what is going on inside due to poor lighting. We spoke to our technician and decided that it will be good to use a lighting kit for our test shoot to see if it improves the visibility inside the house. Additionally, the animatic helped us to realise how difficult it is to match our radio script to what is going on in the sequence. We had to break it up in a way to make it seem as if the announcement was ongoing, even when the camera cuts to the stalker's point of view. Also we found that our soundtrack didn't work too well with the beginning section of our opening as it was overly dramatic for a morning routine. This will either be changed completely or another soundtrack will be used as well as the original for our test shoot and rough cut. Overall the animatic helped us to find out what to check and change for our test shoot. It also helped us to see the position of the credits and whether they interfered with what appeared on screen, which is why a simple and plain font with no effects was used.
R+P Post 12: Our Storyboard
After creating our timeline, we used it to make a storyboard. We made a storyboard so that we had a plan for the exact framing of each of our shots and what we wanted them to look like when they are filmed. In a similar way, the storyboard was split into the three sections beginning, middle and end. We used a piece of sugar paper and post-it notes for to create our storyboard. By using a large sheet of sugar paper, the three of us had plenty of space and we could all sit around it when working on it together. On the post-it notes we drew out each shot and the framing we would like to use. We also used different coloured post it notes to represent the different types of shots. Orange represented long shots, pink represented mid-shots, green represented close ups and yellow was for the titles/idents. The post-it notes meant that we could change the shot order or framing easily if we weren't happy with it. By using different colours we could also see if we had too many of one type of shot and whether we needed to vary it more. As well as visually representing all of the shots, we added where we were going to position the credits as well.
Our storyboard was very beneficial as it helped us to visualise our shots which would make filming much easier as we know exactly what we wanted from each shot. This will also help for editing as it is a clear representation of the order of the shots in the sequence.
Here is our storyboard split up into the three sections beginning, middle and end.
Our storyboard was very beneficial as it helped us to visualise our shots which would make filming much easier as we know exactly what we wanted from each shot. This will also help for editing as it is a clear representation of the order of the shots in the sequence.
 |
| Our Storyboard |
Here is our storyboard split up into the three sections beginning, middle and end.
 |
| Beginning Section |
| Middle Section |
 |
| End Section |
R+P Post 11: Our Timeline
We started planning our opening sequence by creating a timeline. We made a timeline in order to plan each shot and the sounds/credits that would go with it. It also gave us a rough idea on how long our opening will be. The timeline was split into three horizontal tracks titled Video Track, Voice Track and Sound Track. The video track consists of the film shots, titles and credits we plan to include. The voice track was for dialogue and voice overs. As our opening has no dialogue, we planned where our radio announcement voice over would go and how long it would last. This also enabled us to plan which shots it would go with. The sound track was for our soundtrack and any sound effects we want to include. This process helped to decide the timings of each shot, voice over and sound effects.
Below are images of each section of our timeline. It has been split into beginning, middle and end. As our sections aren't equal in length they don't follow the template for the sections so I have indicated where each section starts/ends with a black line.
Overall I found that creating the timeline was extremely useful as it meant we had to think carefully and plan out every single shot we intend to include. It was difficult to decide the timings as we can't tell exactly how it will turn out when it is filmed. This will also be helpful when we are editing as we know where each sound effect goes and how long it lasts and the same for the radio announcement.
 |
| Our whole timeline |
 |
| Beginning |
 |
| Middle |
 |
| End |
Subscribe to:
Posts (Atom)